How to Set Up Your Email in Outlook
This Tutorial will walk you through setting up an email address in Microsoft Outlook to check a POP3 Account on jhWebWorks’ servers.
You will use the email address and password we set up for you, or you requested, on your account on our servers.
NOTE: All screenshots may not look exactly the same for all versions of Outlook, but they will be similar and these setting remain the same.
1. Open your Outlook, Outlook Express or Windows Mail
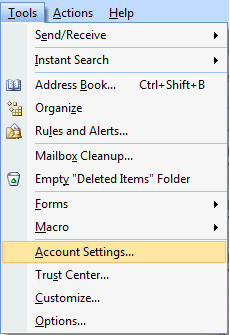
2. Click on Tools Menu, select Account Settings
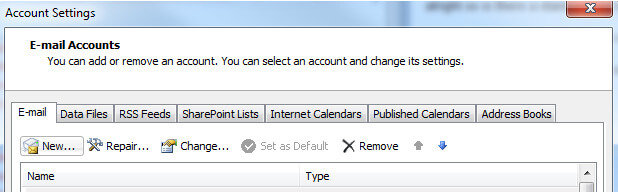
3. Click “New” in the window that opens
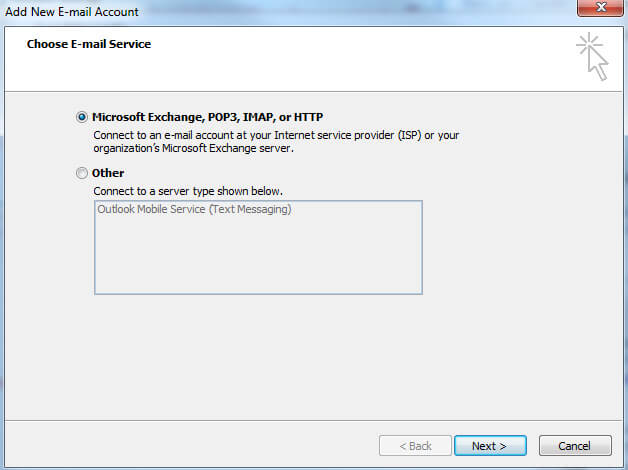
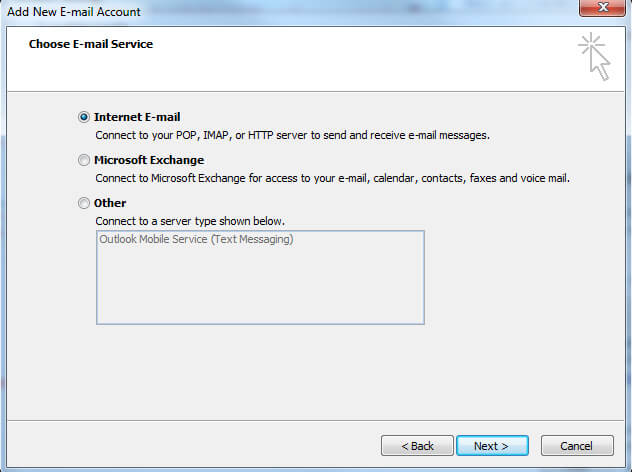
4. Select Microsoft Exchange, POP3, IMAP or HTTP from the screen shown below and click next
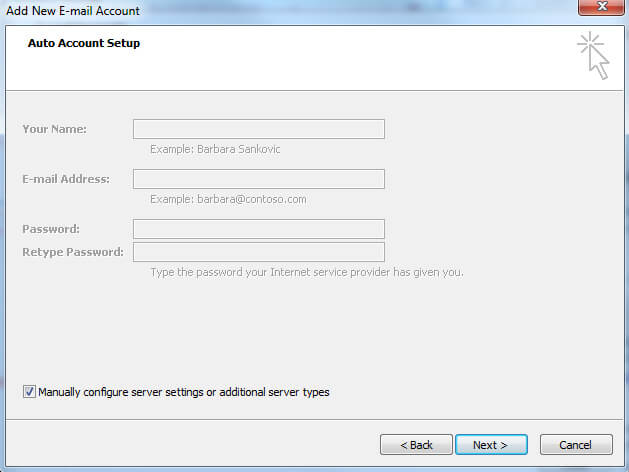
5. Select the check box “Manually configure server settings or additional server types as soon in screen below and click Next.
6. Select Internet E-mail and click Next
7. Enter Details shown in the following screen, replace, name, email, password and domains names to reflect your domain name.

8. Click “More Settings” button and click “outgoing Server” tab as shown below and make sure you select “My Outgoing server (SMTP) requires authentication”

9. Click on Advanced tab and enter values shown in screen shots below

If you want to check this account on more than one device, make the settings in Step #9 as follows:
- On your more important device (probably your PC) use the settings above (Check “Leave a copy of messages on the server” AND “Remove from server after”) and set the number of days to 3, 5 or 7. If you get a lot of email and/or large emails, set it to 3 days or less. If you don’t, you can set it to 5 or 7 days.
- For your less important device (phone, tablet, etc) only check “Leave a copy of messages on the server”.
- This way your can check your email from your other device(s) and your PC will be in charge of removing the email.
- Do not check “Remove from server when deleted from ‘Deleted Items’ as the email will never be deleted unless you delete it from Outlook. If you just put it in the Trash, it will never be removed from the server if you don’t empty the trash.
10. Click on the Test Account Settings button, you should see two tasks completed successfully as show below in the screen shots.

11. Click Close, and click Next and Finish.